React Native
Thanks to the react-native-wgpu package, WebGPU and TypeGPU can be used in React Native applications, giving easy access to the device’s GPU rendering and computing capabilities.
Example project
Section titled “Example project”You can check out the typegpu-rn-examples project, showcasing a few examples from our live examples page in a simple mobile application.
Before installing TypeGPU packages, make sure to upgrade react-native-reanimated and react-native-worklets packages to the newest version.
To use TypeGPU in your React Native application, install the following packages:
npm i react-native-wgpu typegpu @typegpu/reactnpm i --save-dev unplugin-typegpu @webgpu/typesSince WebGPU is still yet to reach baseline in browsers, types for it need to be installed and setup manually:
{ "compilerOptions": { "types": ["@webgpu/types"] }}If you’re using Expo and you don’t have a custom babel.config.js file yet, create one using the following command:
npx expo customize babel.config.jsAdd unplugin-typegpu/babel to the list of plugins in the babel.config.js file.
module.exports = (api) => { api.cache(true); return { presets: ['babel-preset-expo'], plugins: ['unplugin-typegpu/babel'], };};After adding the plugin it might be necessary to clear the Metro cache.
npx expo start --clearReact Native WebGPU is not yet supported by Expo Go.
If you previously used it for running the application, it is necessary to execute the expo prebuild command.
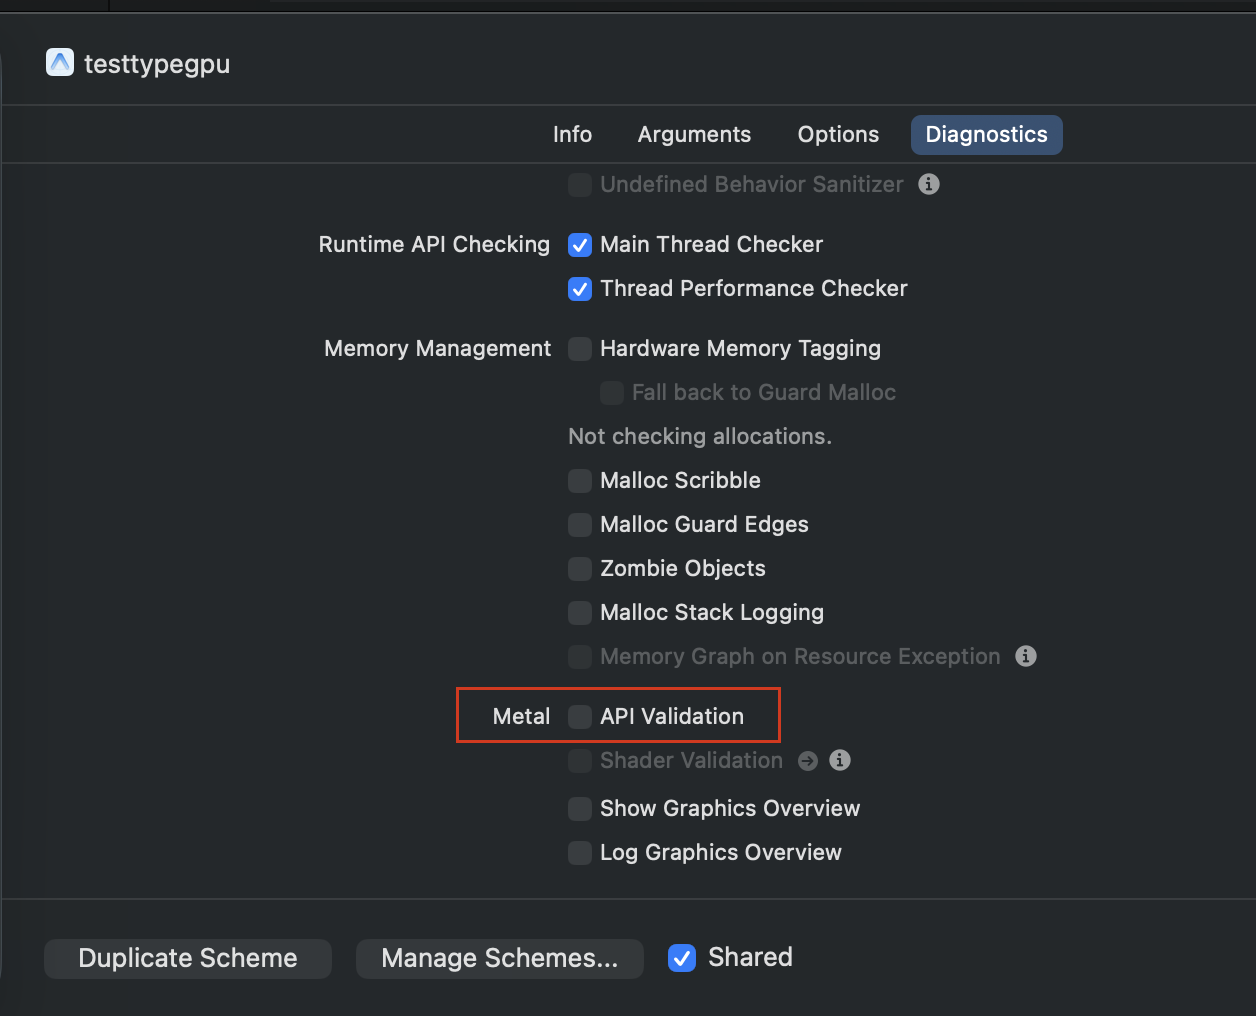
npx expo prebuildTo run React Native WebGPU on the iOS simulator, you need to disable the Metal validation API. Open Xcode, select Edit Scheme:
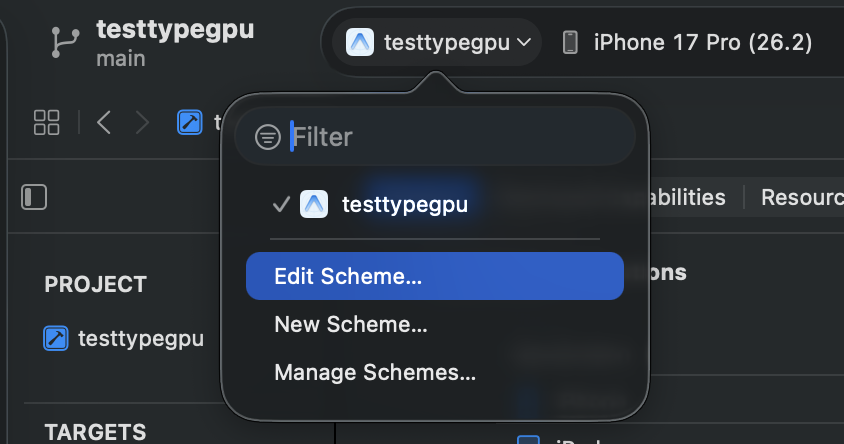
and in Diagnostics tab deselect Metal API Validation:
Hello world example
Section titled “Hello world example”If you want to quickly test if the installation was successful, here’s a simple example component, rendering a blue triangle, that you can use in your app:
import { useMemo } from 'react';import { Canvas } from 'react-native-wgpu';import tgpu, { d } from 'typegpu';import { useRoot, useFrame, useConfigureContext } from '@typegpu/react';
const positions = tgpu.const(d.arrayOf(d.vec2f), [  d.vec2f(0.0, 0.5),  d.vec2f(-0.5, -0.5),  d.vec2f(0.5, -0.5),]);
export function Triangle() {  const root = useRoot();
  const pipeline = useMemo(() => {    return root.createRenderPipeline({      vertex: ({ $vertexIndex: vid }) => {        'use gpu';        return {          $position: d.vec4f(positions.$[vid], 0, 1),        };      },      fragment: () => {        'use gpu';        return d.vec4f(0.114, 0.447, 0.941, 1);      },    });  }, []);
  const { ref, ctxRef } = useConfigureContext({ alphaMode: 'premultiplied' });
  useFrame(() => {    const ctx = ctxRef.current;    if (!ctx) return;
    pipeline.withColorAttachment({ view: ctx }).draw(3);
    // A react-native-wgpu requirement for flushing the rendered effect    ctx.present?.();  });
  return <Canvas ref={ref} style={{ aspectRatio: 1 }} transparent />;}
What’s next?
Section titled “What’s next?”- To learn more about how to use TypeGPU in React, head on over to the @typegpu/react documentation.
- To learn graphics programming from the ground-up using TypeGPU, start with our Fundamentals series of guides.