Events
In the real world nothing changes instantly–there is always something between the states. When we touch a book we don't expect it to open instantly on a certain page. To make mobile apps feel more natural to the user, we use animations to smoothen out user interactions with the app user interface.
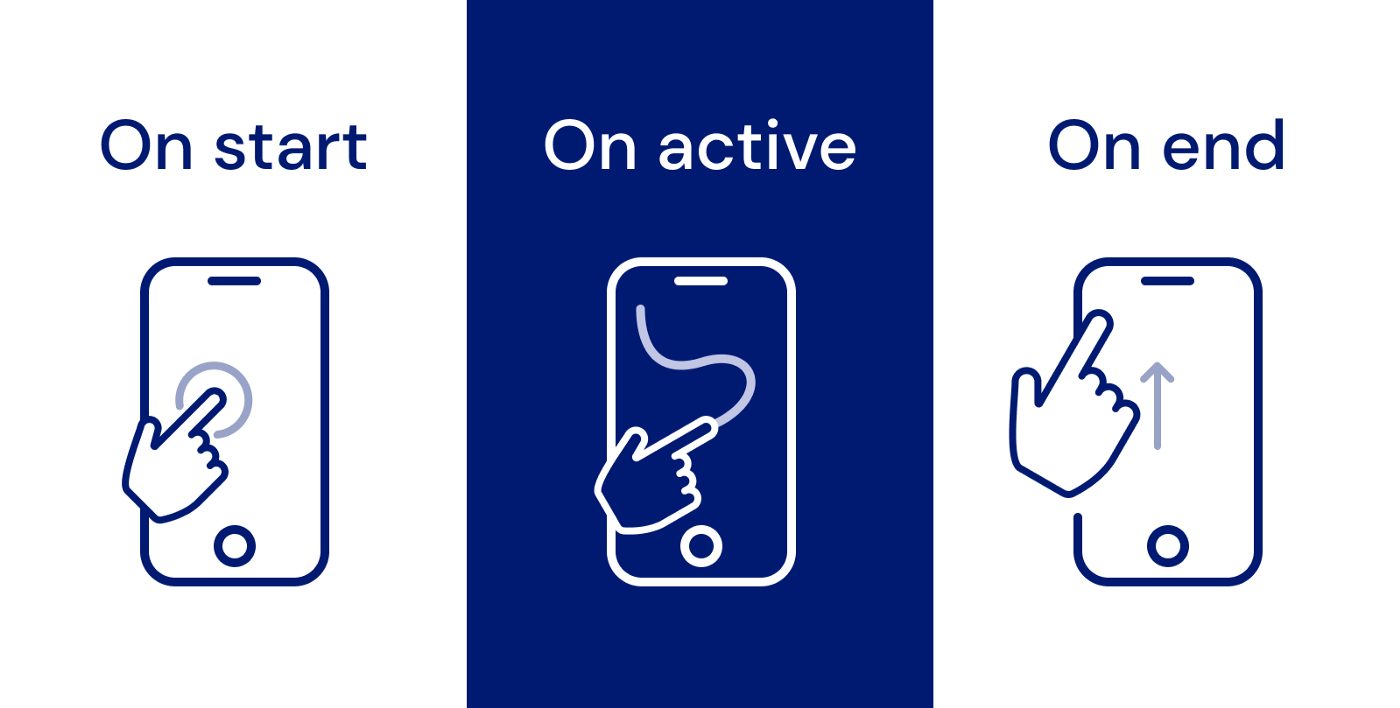
To show how event handling is done in Reanimated 2 we are going to lead you step by step towards achieving the following result:
Handling gesture events
Reanimated 2 integrates tightly with the react-native-gesture-handler package for the ability to define performant gesture-based interactions. We explain the library's APIs whenever we use bits of it in our examples, however, if you'd like to learn more about the gesture-handler outside of the context of reanimated, please visit the documentation website here.
For Android OS, be sure to wrap your app entry point with <GestureHandlerRootView> component from react-native-gesture-handler library to capture events properly.
import { GestureHandlerRootView } from 'react-native-gesture-handler';

export default function App() {
  return (
    <GestureHandlerRootView style={{ flex: 1 }}>
      {/* content */}
    </GestureHandlerRootView>
  );
}
Going back to the interaction example, we start by focusing on tap events only.

const EventsExample = () => {
  const pressed = useSharedValue(false);
  return (
    <TapGestureHandler onGestureEvent={eventHandler}>
      <Animated.View style={[styles.ball]} />
    </TapGestureHandler>
  );
};
Here, we define a component with a shared value that tells us whether the view that we render is being pressed. We use the TapGestureHandler component from react-native-gesture-handler library to wrap the main View in order to tell the framework which of the rendered elements are interactive.
Next, we add an event handler to it — it will react to notifications about tap events from TapGestureHandler. For defining event handlers, Reanimated provides a hook that is specifically designed to work with the gesture-handler package, it is called useAnimatedGestureHandler.
const eventHandler = useAnimatedGestureHandler({
  onStart: (event, ctx) => {
    pressed.value = true;
  },
  onEnd: (event, ctx) => {
    pressed.value = false;
  },
});
This hook allows us for defining a number of worklets (e.g., onStart or onEnd), each of these will be used to process a different state in the gesture recognition process. In this example, we will use onStart worklet which is called when the gesture is started (we press the screen down), and onEnd that fires up when the gesture is ended (i.e., the finger is lifted from the screen). We use these two worklets to update shared value pressed accordingly (don't pay the attention to the arguments that are provided to the worklets, we will explain that later on).
To connect the defined event handler with the gesture handler component, we now pass it to TapGestureHandler as an onGestureEvent property:
<TapGestureHandler onGestureEvent={eventHandler}>
Now all we have to do is to use the useAnimatedStyle hook in order to map the pressed shared value state to the view's styles. When pressed is true the dot's color will turn from blue to yellow and it will get bigger. On false both of those parameters will get back to their previous values.
const uas = useAnimatedStyle(() => {
  return {
    backgroundColor: pressed.value ? '#FEEF86' : '#001972',
    transform: [{ scale: pressed.value ? 1.2 : 1 }],
  };
});
Also don't forget to pass animated style to the animated view:
<Animated.View style={[styles.ball, uas]} />
After incorporating the changes described above here is what you will see on the screen:

Reanimated 2 makes it very easy to animate between state changes. You can try adding withSpring or withTiming in useAnimatedStyle to make this interaction feel much more natural:
{
  scale: withSpring(pressed.value ? 1.2 : 1);
}
Handling continuous gestures
In the previous example when we learned how to handle tap gestures, we only responded to events that indicated the start and the end of the gesture. This comes from the fact that tap is a discrete gesture, that is it triggers at a specific point in time when we know the gesture is recognized. If we are interested in handling a movement of a finger on the screen, we need to receive a continuous stream of touch events. For this purpose, PanGestureHandler from react-native-gesture-handler package can be used. PanGestureHandler not only reports down and up events (that we subscribed to with onStart and onEnd worklets), but also allows us to track the finger as you pan it around the screen. When the panning gesture is recognized it feeds a stream of touch events to onActive callback for the whole duration of the user interaction.
In order to keep track over the view movement, we define a pair of new shared values in which we are going to store the view coordinates:
const startingPosition = 100;
const x = useSharedValue(startingPosition);
const y = useSharedValue(startingPosition);
Now, to keep the values defined above in sync with the gesture, we modify useAnimatedGestureHandler behavior.
const eventHandler = useAnimatedGestureHandler({
  onStart: (event, ctx) => {
    pressed.value = true;
  },
  onActive: (event, ctx) => {
    x.value = startingPosition + event.translationX;
    y.value = startingPosition + event.translationY;
  },
  onEnd: (event, ctx) => {
    pressed.value = false;
    x.value = withSpring(startingPosition);
    y.value = withSpring(startingPosition);
  },
});
In the onActive method, we update coordinates using the event payload which is provided as the first argument. We use translationX and translationY that indicates the position of the finger relative to the place on the screen where the panning started. In onEnd call, when the user releases the finger, we animate the coordinates to the starting position.
Don't forget to pass modified event handler to PanGestureHandler:
<PanGestureHandler onGestureEvent={eventHandler}>
  <Animated.View style={[styles.ball, uas]} />
</PanGestureHandler>
The only thing left to do is to update useAnimatedStyle body such that x and y shared values are mapped to the view's transforms to position our view on the screen:
const uas = useAnimatedStyle(() => {
  return {
    backgroundColor: pressed.value ? '#FEEF86' : '#001972',
    transform: [{ translateX: x.value }, { translateY: y.value }],
  };
});
Using context
Let's now try to modify the above example to make the view stay in the place where we lift the finger up, then allow for it to be panned around from that place. This simple modification makes things a bit more trickier and the reason is that when the new gesture is started, the translation values it provides in the event payload are relative to the starting position of the gesture. As a result, we cannot just directly map the gesture translation to the view offset on the screen. One way to solve this is by making a temporary state where we can keep the starting offset of the view. For this purpose we can use the context argument that is provided to each of the gesture handler worklets. Context is just a Javascript object that is shared between all the callbacks. In other words, all methods defined as gesture handler callbacks receive the same instance of context object–you are free to store any data in it within the callback or read from the context directly.
Here is how we can save the starting position in onStart callback using context:
onStart: (event, ctx) => {
  pressed.value = true;
  ctx.startX = x.value;
  ctx.startY = y.value;
},
Then we can use it in onActive to compute the current position
onActive: (event, ctx) => {
  x.value = ctx.startX + event.translationX;
  y.value = ctx.startY + event.translationY;
},
As you can see context may be really handy sparing us declaring additional variables in our code thus making it more clear.
Reanimated and react-native-gesture-handler
You have already met TapGestureHandler and PanGestureHandler but there are many more. For instance, you can listen for pinch gestures with PinchGestureHandler. It allows you to track the distance between two fingers and uses that information to scale or zoom your content. The full list of available gesture handlers can be found here.