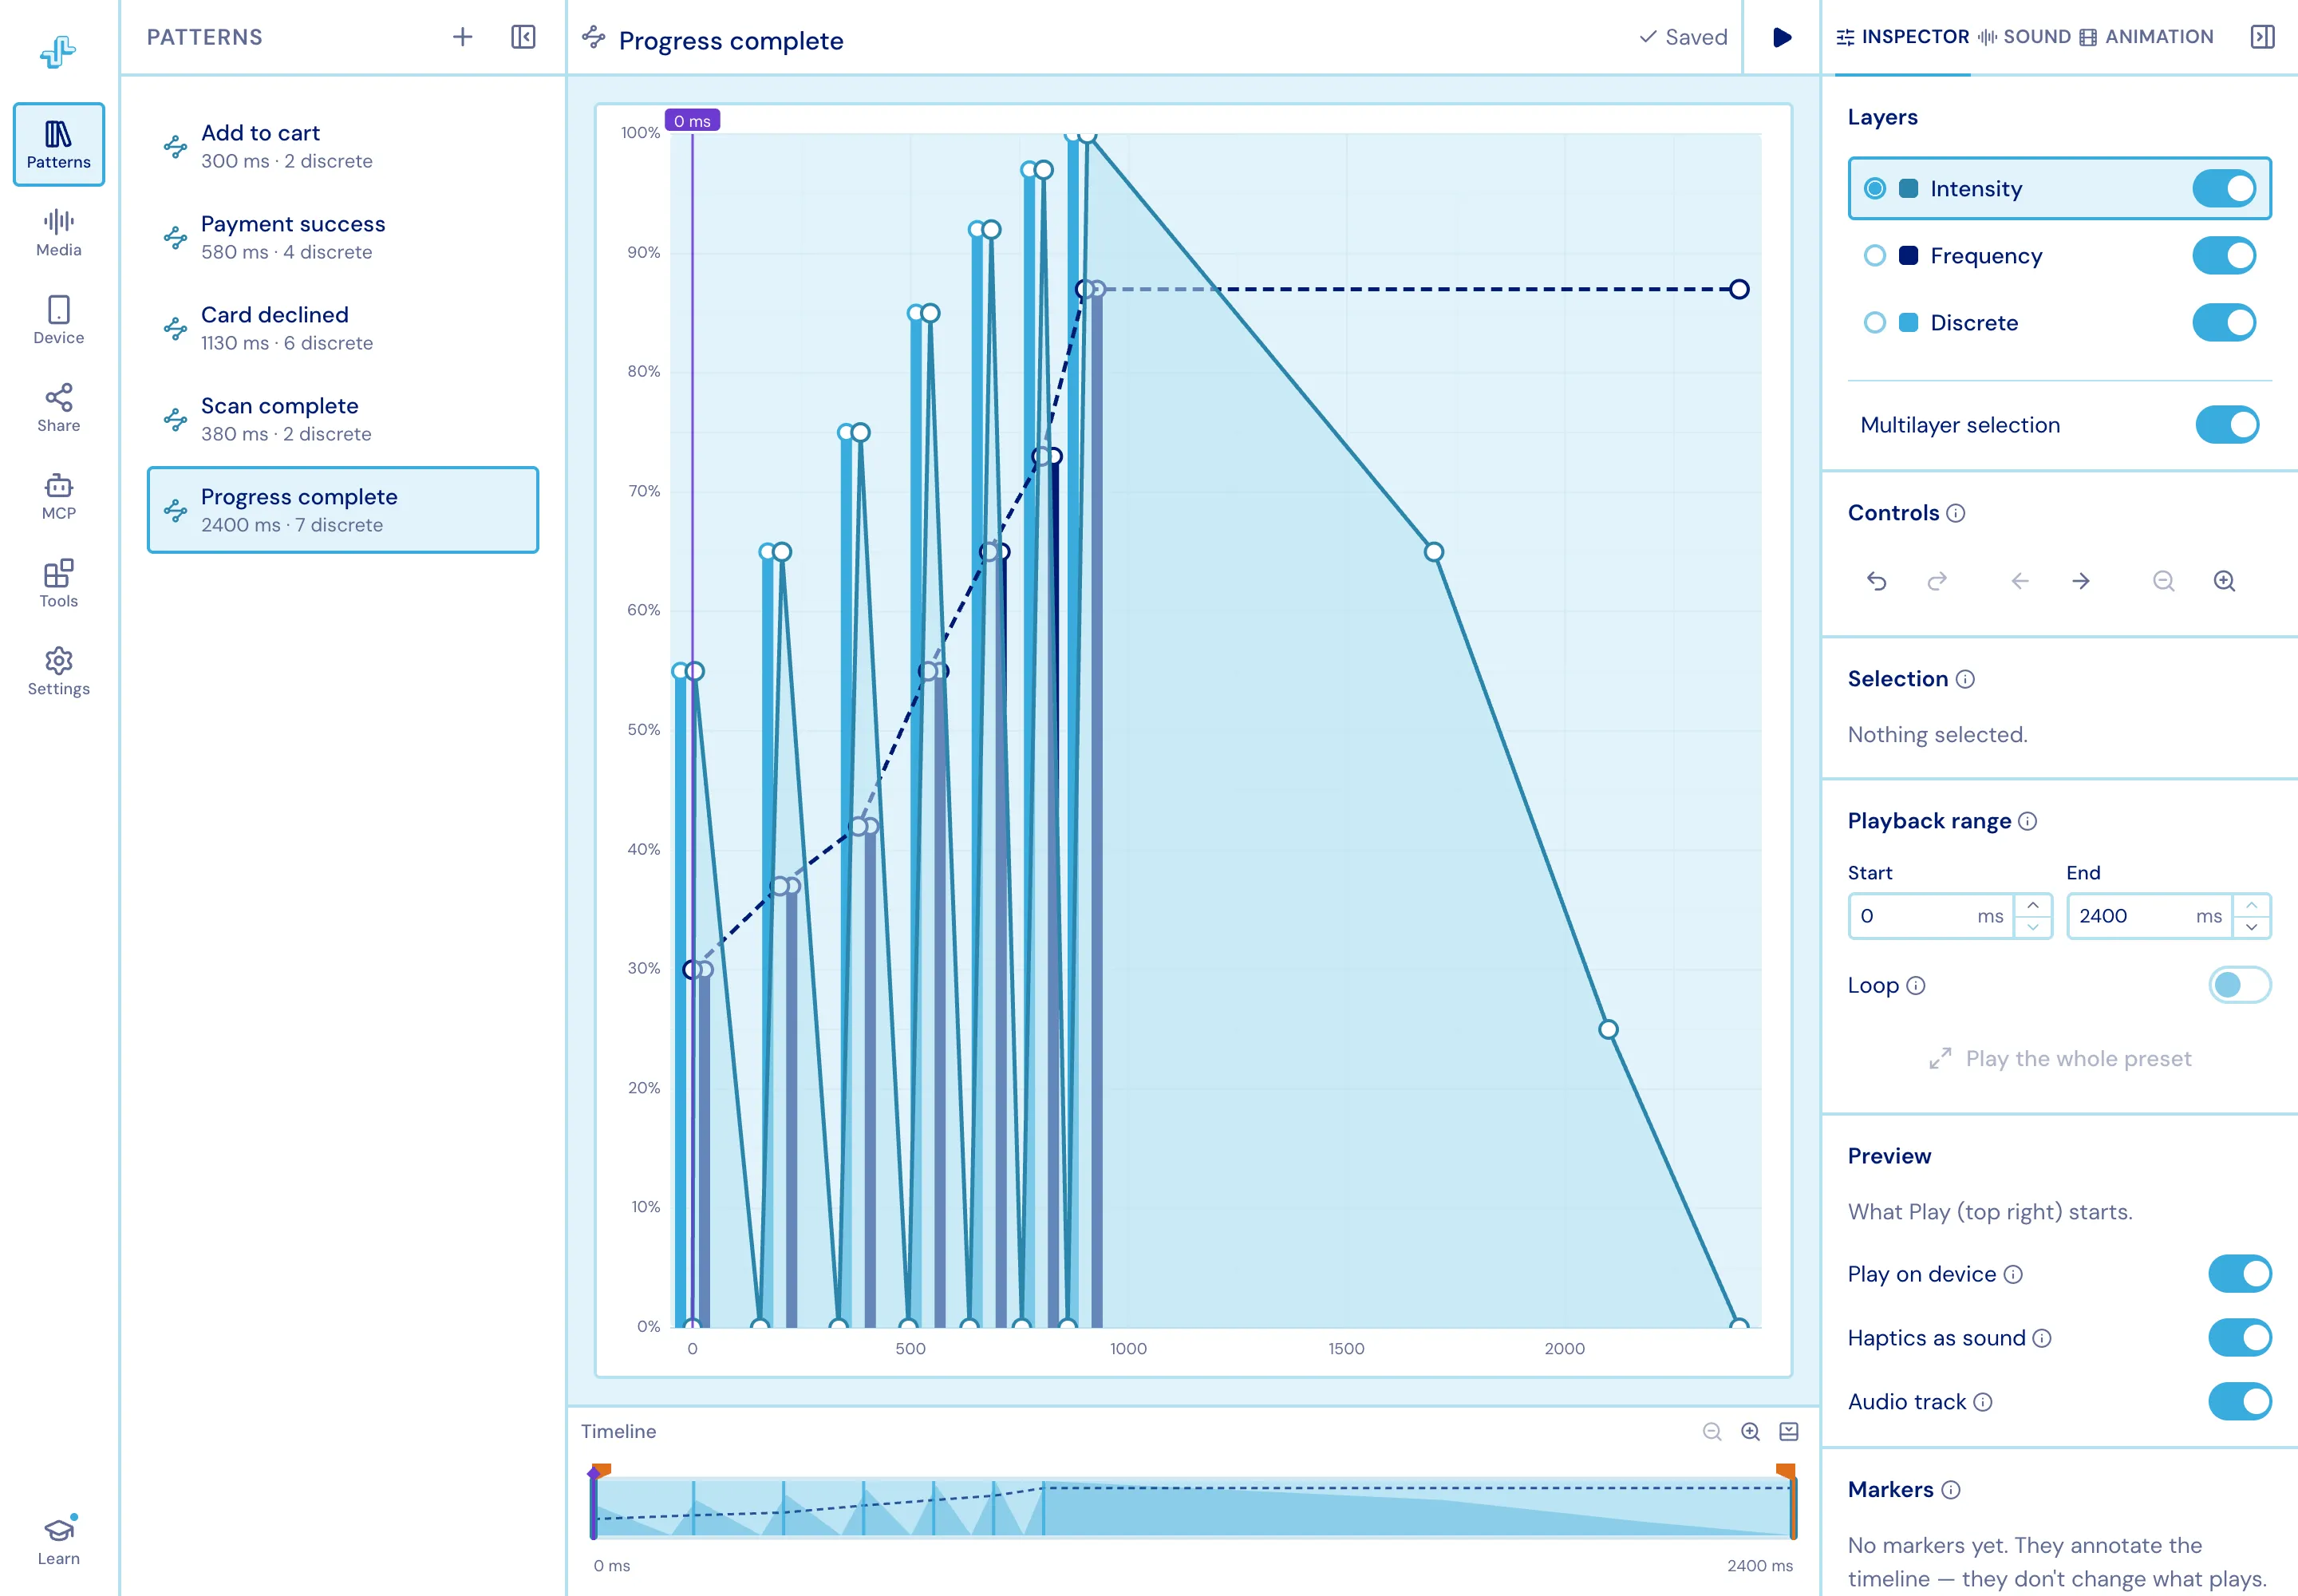
The editor
Three columns, plus a bar of lanes under the chart.
Left: the activity rail
Section titled “Left: the activity rail”Each icon opens a resizable column beside it; clicking the open one again closes it.
| Item | What it is for |
|---|---|
| Patterns | Every pattern in the project. This is the only pattern switcher. |
| Media | The audio and animation files uploaded to the project. |
| Device | Pairing with real phones. The icon turns green while a paired phone is reachable right now. |
| Share | A link a coworker can open on their own phone. |
| MCP | Connecting an AI agent to this editor. |
| Tools | Eight plugins - library, snippets, tap rhythm, voice sketch, time warp, trimming, analysis, linting. |
| Settings | Appearance, grid, precision, pointer, playback, selection, the shortcut list, and Help. |
| Learn | The walkthroughs. A dot means you have not finished them all. |
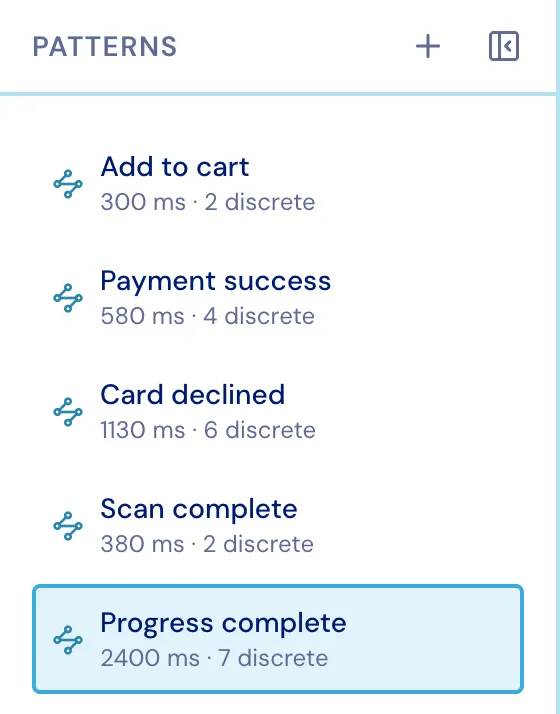
Click a row to open that pattern; right-click one for Rename, Duplicate and Remove. Only one pattern is open at a time.
Middle: the chart
Section titled “Middle: the chart”Time runs left to right, value bottom to top.
- Double-click empty canvas to add a point - or a tap, on the Discrete layer - to the active layer.
- Drag a point to move it. Hold Shift to lock it to one axis.
- Marquee-drag to select a group, then drag the group as a whole. A marquee covers only the active layer unless Multilayer selection is on.
- Middle-drag pans, ⌘/Ctrl + wheel zooms at the pointer, and the wheel scrolls through time.
- Crosshair rails follow the pointer with an exact time and value readout.
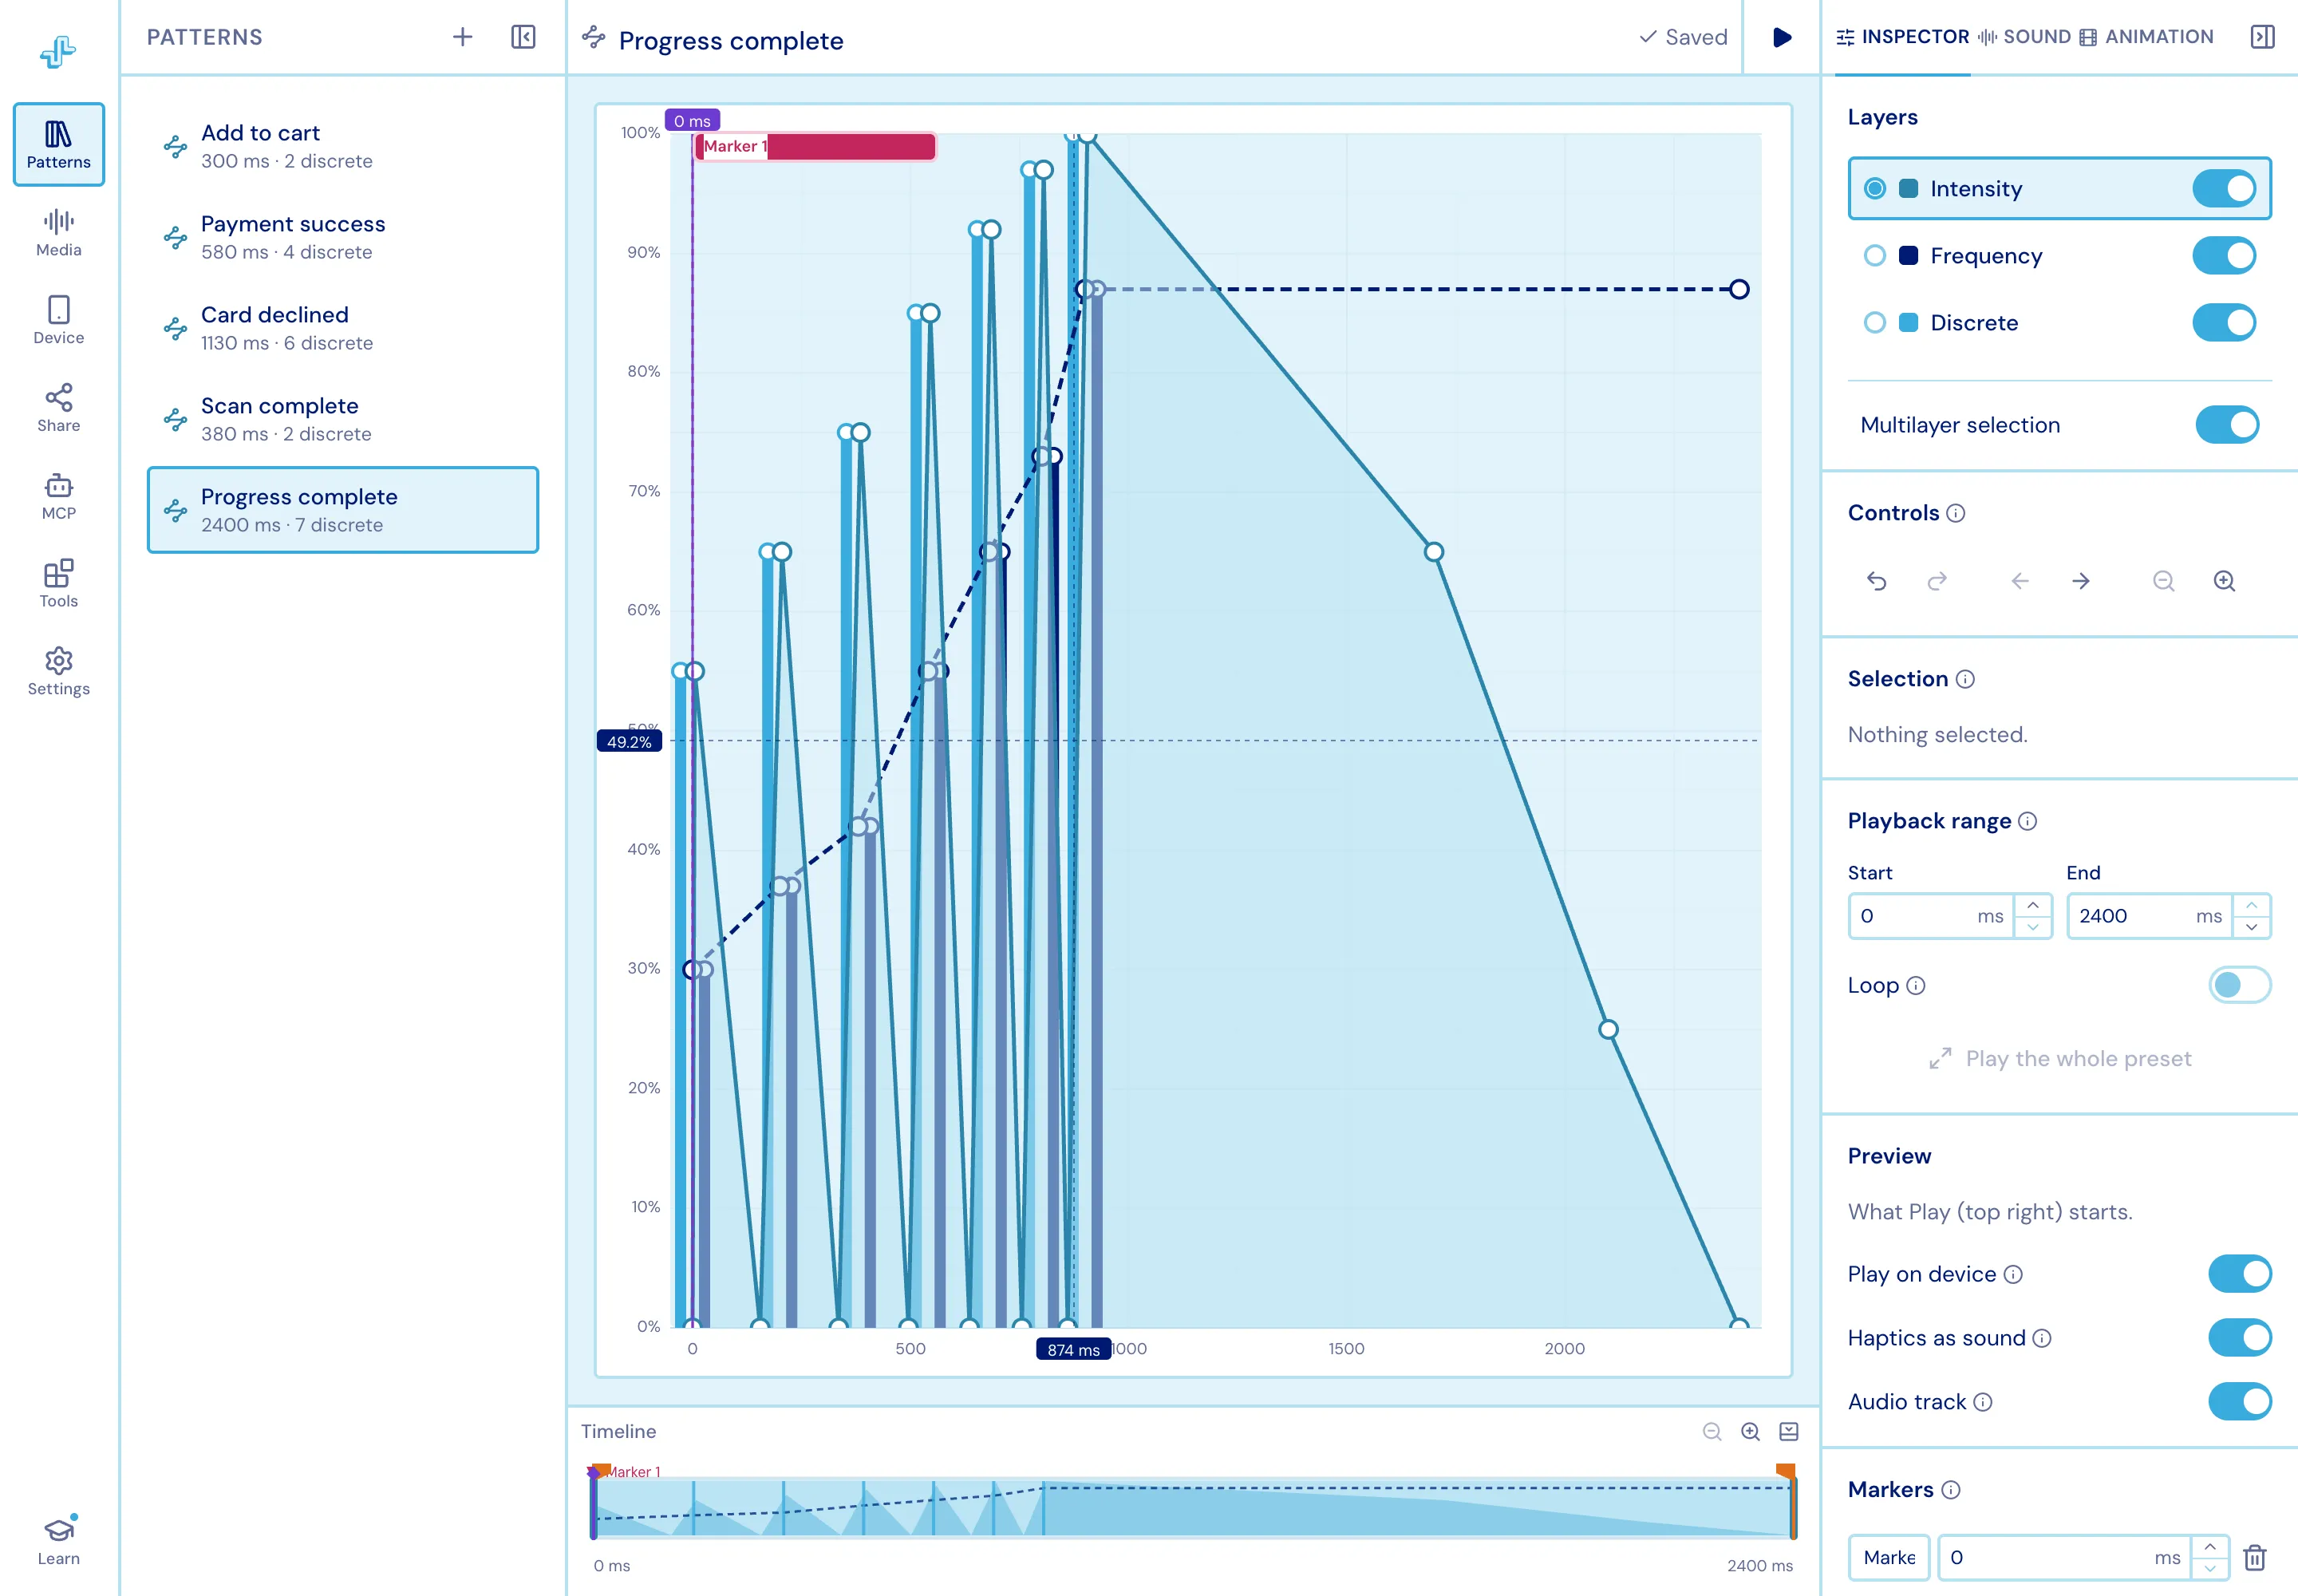
Right-click the canvas for everything the keys do: undo/redo, add a marker, save the framed range as a snippet, open a pattern from file, zoom and pan, switch the active layer, select it all, or clear the pattern.
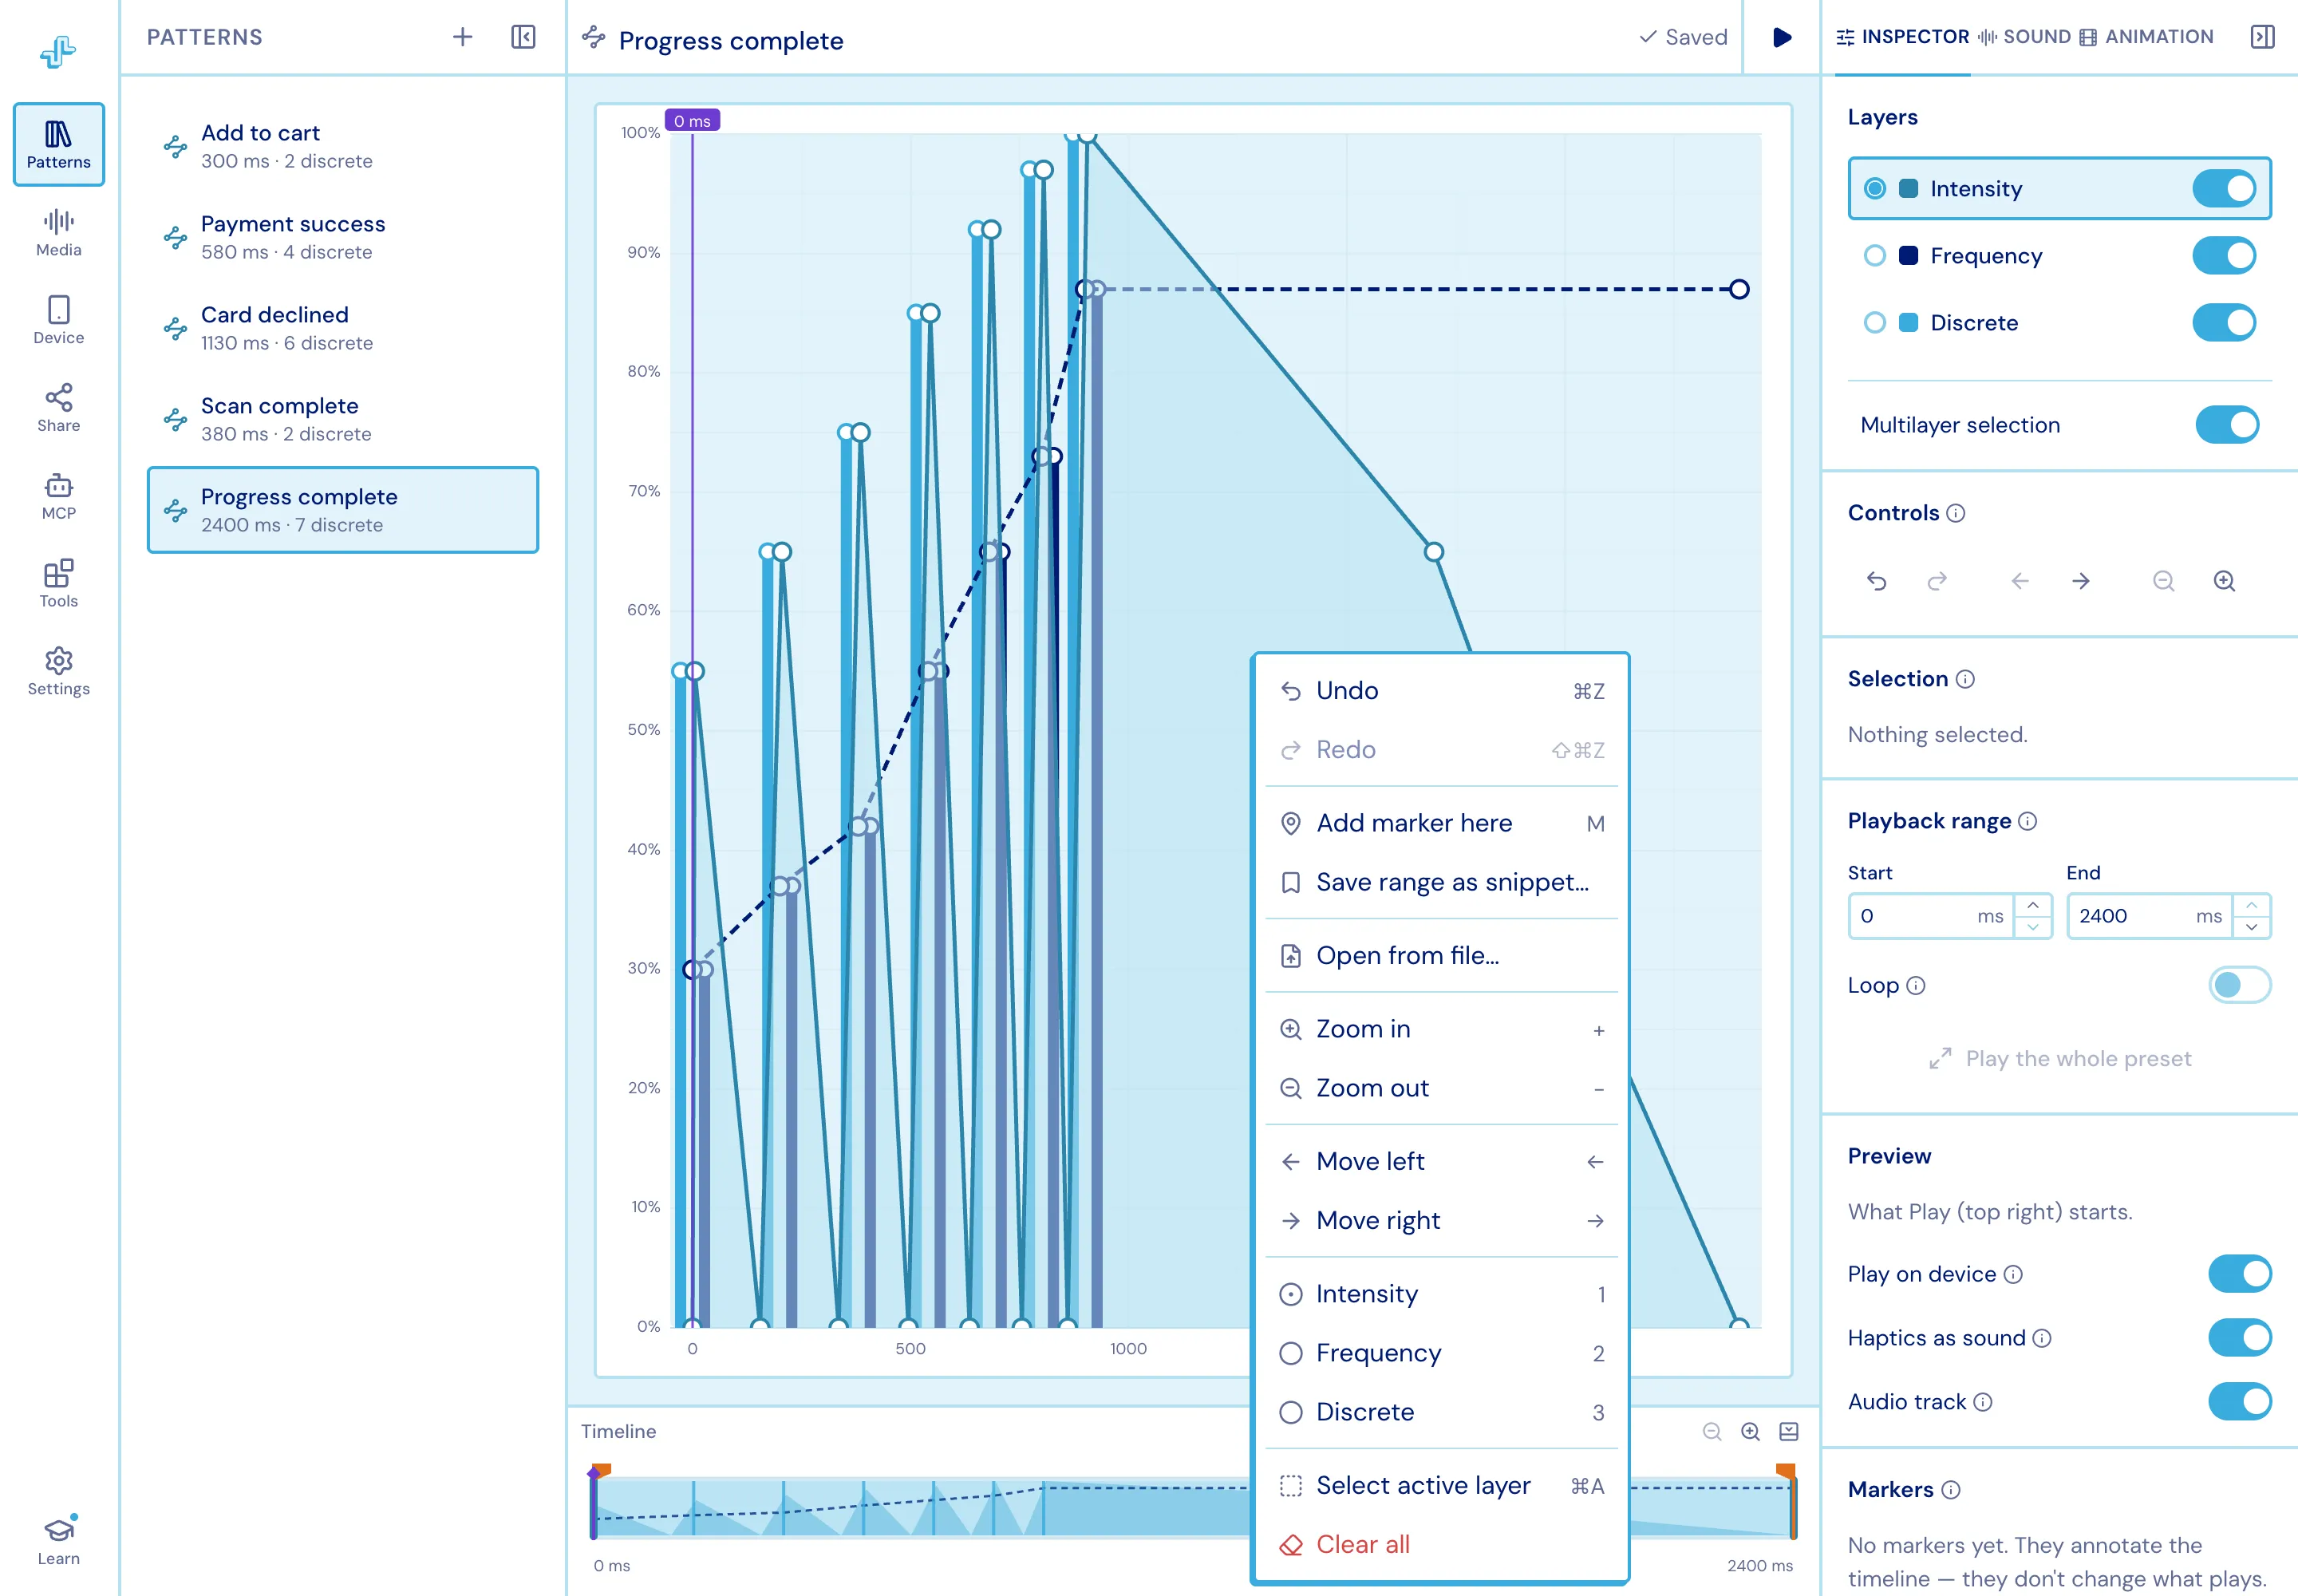
Markers are named points in time you drop on the chart. They annotate the timeline - they never change what plays - and they save, sync and undo with the pattern.
Under the chart: the lanes
Section titled “Under the chart: the lanes”All the lanes share the chart’s time axis. The whole section is resizable and collapsible.

- Timeline - the viewport window, the marker lane, and the two handles that set the play range. Drag the needle to scrub.
- Audio lane (green) - the attached track’s waveform, drawn over its trimmed window.
- Animation lane (violet) - a filmstrip of the attached Lottie’s frames.
Right: the inspector
Section titled “Right: the inspector”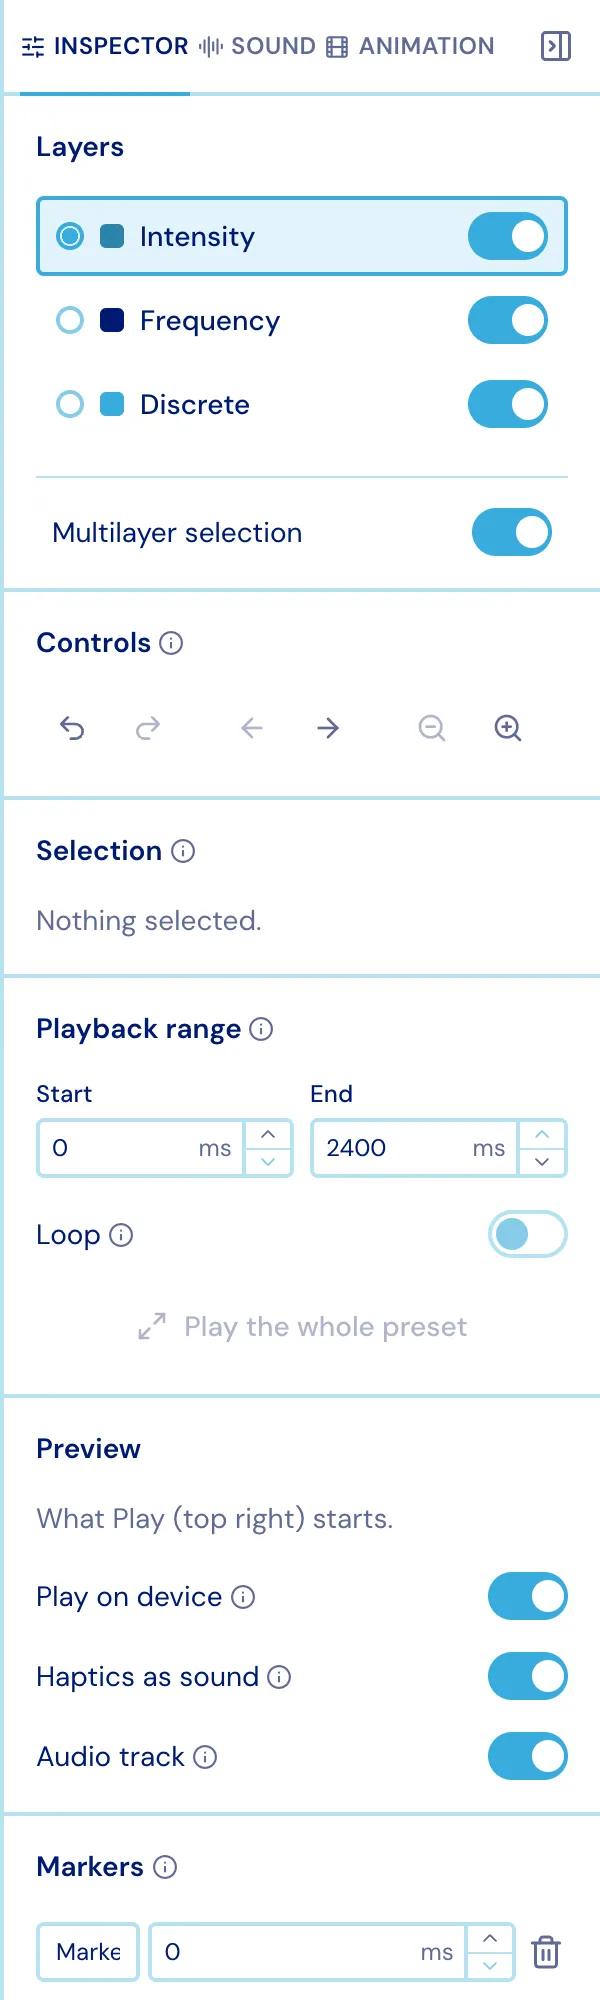
Three tabs:
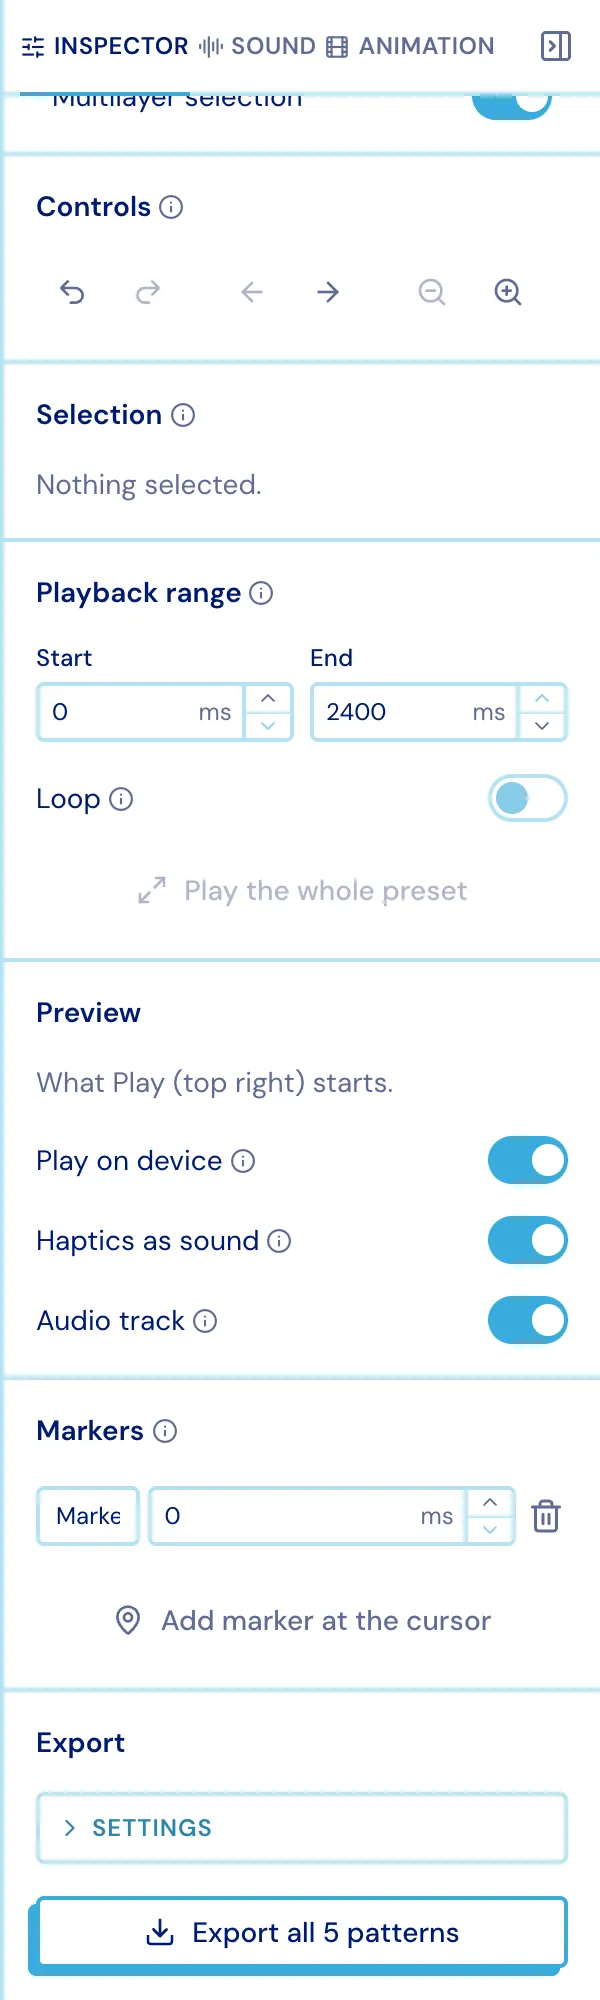
- Inspector - layers, undo/redo and view controls, the current selection’s exact values, the playback range, the Preview switches, markers, and Export.
- Sound - the attached track, its signal analysis, and the haptics generated from it. Always present, even with nothing attached.
- Animation - the same, for an attached Lottie.
Attaching audio or an animation selects the matching tab and un-collapses the column; detaching drops back to Inspector. Both side columns have a hide button.
Selection
Section titled “Selection”Select points and the inspector shows exactly what you have, with editable values - so a shape you dragged roughly into place can be finished by typing.